ClarkVision.com
| Home | Galleries | Articles | Reviews | Best Gear | Science | New | About | Contact |
Night Photography Image Processing,
Best Settings and Tips
by Roger N. Clark
| Home | Galleries | Articles | Reviews | Best Gear | Science | New | About | Contact |
by Roger N. Clark
Learn best practices, settings and processing tips for night photography here. The web is full of bad advice on night photography, but very simple methods for night photography and post processing can produce outstanding images.
The Night Photography Series:
Contents
Introduction
In-the-Field Setup
Post Processing Night Images
Color Balance and Light Pollution
Adjusting with the Curves Tool
Processing Comparison
But I Really Want Blue Skies
Conclusions
References and Further Reading
Great photography of any sort generally avoids saturation of key elements in the scene. If one wants to show the natural world in its beauty, we generally want to record the natural colors that exist. For example, would you want to photograph a sunset and saturate the clouds to be all white with no color or tonality, and the only color in the scene is blue? It would generally be considered a poor photo and not representative of the natural scene, though might be considered by some as artistic.
Too often these days photographers are told that when doing night photography to crank up the iso (WRONG), use tungsten white balance (WRONG), record raw and boost the signal with sliders to bring out fainter parts of the image (WRONG, WRONG, WRONG, WRONG, WRONG). To see why this is wrong, read the first two articles in the series, links at the top of the page, then return here. Of course, these things are not wrong if you are trying for unnatural effects, and want to set some strange mood. I'm OK with anyone coloring their images any way they want, just don't tell me my images, like those in this article, are not natural and I should color them blue. If you too are thinking this way, see my article on The Color of the Night Sky.
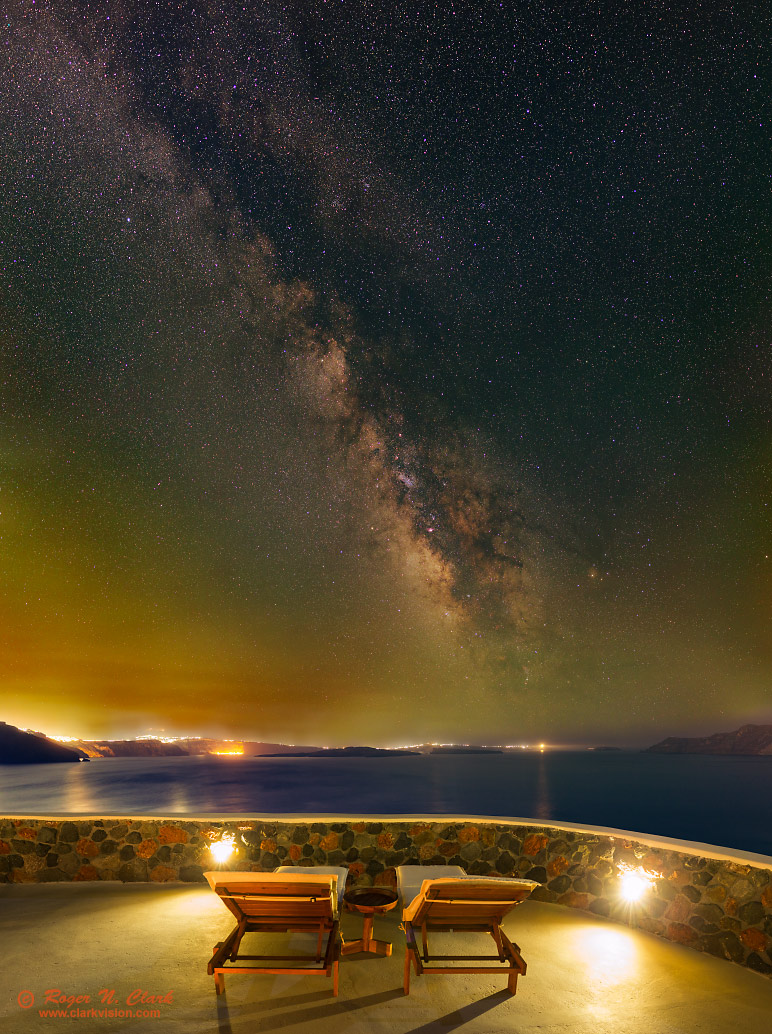
OK, so now you've read about the myths of night photography, ISO, f/ratios, and the real colors in the night sky, below I describe best practices for obtaining and processing night images. This is especially important for star fields, but equally applies to city nightscapes, as the image in Figure 1 illustrates.
If you follow advice on the web, which is also taught in magazines and even taught by "professional" photographers in nightscape workshops. Most of these "pros" would not be caught dead showing a landscape with saturated lifeless clouds but seem to think that night photos with all white stars on a deep blue background is a great photo. An example of bad processing is shown in Figure 2 using the commonly taught methods.

Here is a good example of the above, published in Outdoor Photographer in 2014: Photographing The Milky Way, where the author advocates using ISO 6400 (or 3200), producing saturated white stars with no color on a blue background. Yuk (my opinion)! Of course it is art, just not natural colors.
After reading the first article in this series (link at top of the page), you should have the knowledge of what are the best camera settings and know your camera well enough to implement them on the camera. In this article, I assume you have a modern camera produced circa 2008 or later. There are major differences in these later model digital cameras, including improved sensitivity, lower pattern noise, and no need for dark frame subtraction on long exposures. For a good DSLR with low pattern noise, I would choose:
The next step is an undocumented feature, not in camera manuals to my knowledge. A big issue with digital sensors, from consumer grade to the top scientific chips are stuck, dead, and hot pixels. A stuck pixel has the same value all the time, regardless of signal or exposure (usually saturated). A dead pixel always gives zero output. A hot pixel is a pixel with high dark current, and that is temperature sensitive. The traditional way to deal with hot/dead/stuck pixels is to do dark frame subtraction. This can be done in the camera (long exposure dark frame subtraction noted above), but that doubles the time to make an image, which means it is too long in many (most) cases because exposure times are already long and time is often critical as the stars are moving. The second way is to measure several dark frames (same exposure time as your night images, but with the lens cap on. Then average the dark frames into what is called a master dark, and subtract it from each night image. This procedure is cumbersome, and it is very difficult to do in programs like photoshop; one needs special astronomical image processing software. There is a simpler way with modern cameras.
Dealing with hot/dead/stuck pixels and uneven backgrounds from dark current became much simpler for CMOS sensor cameras produced around circa 2008 and later. On these more modern cameras, besides improving the microlenses and RGB filters on the cameras, improving sensitivity, manufacturers implemented on-sensor dark current suppression. Cameras that have this feature have no need for measuring dark frames, or turning on long exposure dark frame subtraction. For examples, see long exposure dark frames measured on various cameras here. Note how smooth the dark frame images look on the Canon 1D Mark IV, 7D, 6D, and 1DX, and then the very non-uniform image for the Canon 1D Mark II. You can test your camera by doing about a 5-minute dark frame, then use the curves tool to bring up the low end (you need a 16-bit/channel image file to do this) to examine how uniform it is.
So with modern cameras, post processing becomes simpler without the need for dark frame subtraction. The second problem besides dark current, is what was discussed earlier: hot/dead/stuck pixels. A modern raw converter can read the bad pixel map that gets stored in the raw file and ignore those pixels during raw conversion, effectively eliminated them from the converted raw data (Figure 3, right side). The in-camera generated jpegs do not use the bad pixel map, so in-camera jpegs will show all the bad pixels (Figure 3 left side). This is true for the Canon cameras I have tested, not sure about other models.
In the field at night, conditions are different than the originally developed bad pixel list. So you need to update the bad pixel list at the scene after the camera has equilibrated to the ambient temperature. On Canon cameras select the following menu function
Focus. The final step before imaging, is to focus. Assuming a modern camera with live view, set the ISO to 6400, point at one of the brightest stars in the sky. Zoom in to the maximum available with live view and use a magnifier to view the star image. Move the focus in and out. With many lenses you will probably notice a magenta rim on one side of focus and blue on the other, especially with wide angle lenses. Set the focus to minimize any red or blue fringe. To focus on land that is close by, I simply shine a flashlight on the nearby subject and use live view to focus. It is best to focus at the same f-ratio that you will be imaging at. Some lenses shift focus as one changes f/ratio because of spherical aberration. This is generally only seen with very fast, wide angle lenses. While this problem may be worse on lower cost lenses, it is observed with some high end fast wide angle lenses.
You are now ready to make your night exposures. With practice, the above can be completed in less than a minute or two. We'll assume you now have some images to process.
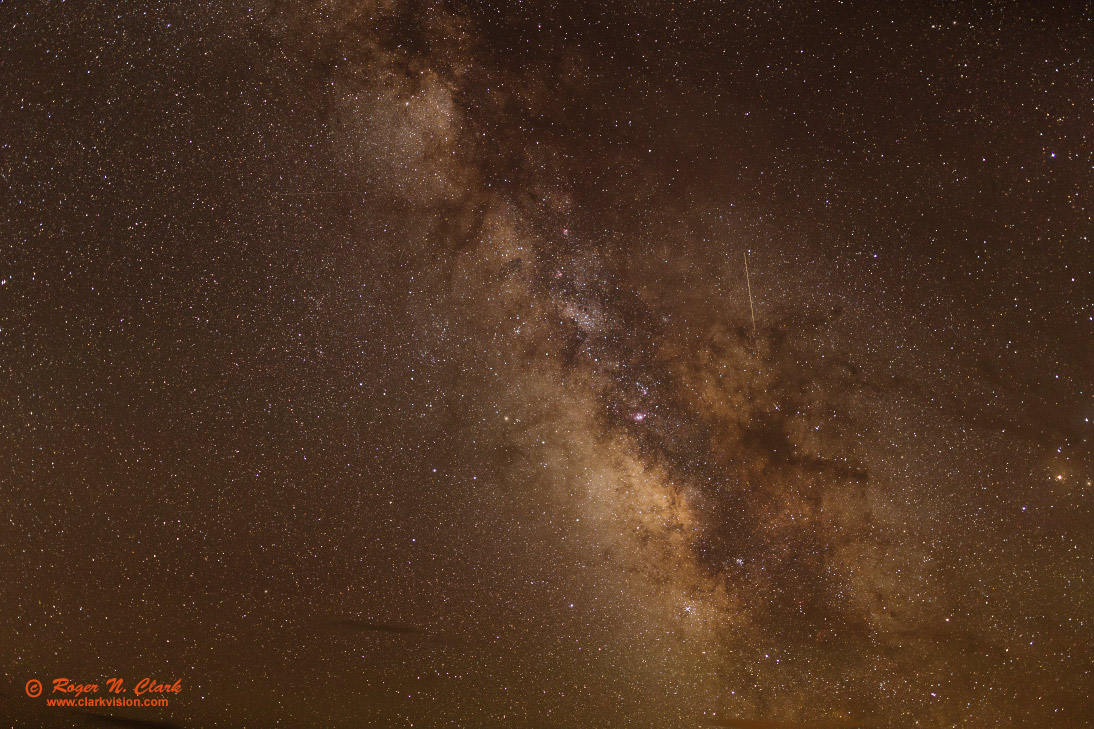
First examine the out-of-camera jpeg image in Figure 4. It suffers from light fall-off which will prevent bringing out image details and improving colors. On this night, there was significant airglow (there is virtually no light pollution from this location in the Colorado Rockies, and the airglow is mostly red, giving the brownish-red tint. On other nights the airglow could add green, yellow, or orange, as well as red. The 8-bits/channel of a jpeg image also limits bringing out faint detail. It is best to work with raw data, a good raw converter and 16-bits/channel.
Using a good raw converter that includes profiled lenses, the light fall-off is corrected (you must turn this on in raw converters like that in Adobe Photoshop ACR). Also turn on chromatic aberration correction. Unless you are using an astronomical image processing program that converts to linear output, the raw converter will be applying a tone curve. The tone curve boosts ALL levels from the raw data. The standard tone curve, boosts the lowest signals by 10 times, and scrunches up the high end, destroying star colors.
The secret key in raw converting night images, from night cityscapes, to stars and astrophotos is to REDUCE the exposure slider in the raw converter by (at least) one stop. Remember, because the low end was already boosted 10x, reducing exposure by one stop, 2x, means the low end is boosted 5x, which is still plenty to make sure nothing is lost if one outputs a 16-bit/channel file. Here are the basic settings for raw conversion:
For examples of raw converter settings to maximize detail in the low intensity parts of an image, see this article: Processing Canon Raw Image Data to Maximize Dynamic Range Figures 4 through 7 and associated text are most relevant. Note Figure 4 in that article shows the setting as discussed above but for astro work, set the exposure slider to -1, not zero as in that Figure.
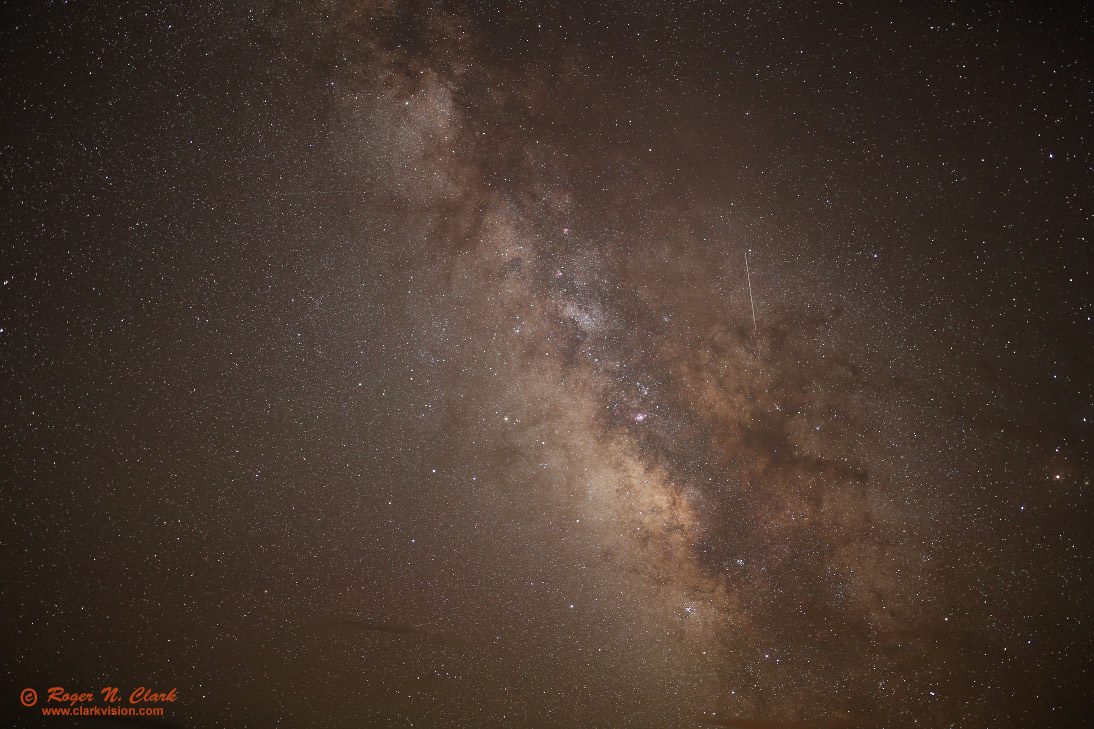
The raw converted image is shown in Figure 5a. Compare the image in Figure 5a to the out-of-camera jpeg in Figure 4. Most important is how well the light fall-off is corrected, simply by checking a box for lens profiles. That is much simpler than developing flat fields and ratoing flat field imaged with the night sky image.
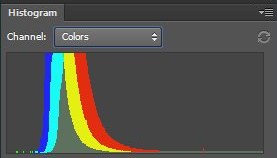
The RGB histogram for the image in Figure 5a is shown in Figure 5b. Note that the three colors in the histogram are offset. Remember, yellow = red + green, and cyan = blue + green. The red histogram appears more to the right (brighter) so the image appears reddish. The image is red because of red airglow in the Earth's atmosphere.
I wanted to bring out the colors in the night sky and improve contrast, so what tools to use? The key to image processing is understanding curves. Understand histograms and curves and you can master post processing, ranging from color correction to changing contrast. There is no need to complex masking and layers, or supposedly fancy filers. Filters, by the way are mostly simple manipulations of curves, for example, contrast and saturation filters where you adjust sliders. This is true also for all photo image processing, not just night photography. For all the images on this site, I predominantly only use curves for contrast adjustments, color correction, color enhancement, and dodging and burning (with selection tools).
Tools with sliders are DANGEROUS: it is too easy to clip the image data and you may not even know it in many cases.
It is important to note that the adjustments using curves in this article are the same as Luminosity Masks, but without the complexity of luminosity masks and layers, and with a lot more control!

One reads many articles on the internet about using color balance to correct the color cast due to light pollution in night images. Correcting light pollution with color balance is the incorrect method. Color balance is a multiplicative process (scaling the red, green and blue channels up or down with a multiplier). Light pollution is added light so it should be subtracted. If you use color balance (multiplier) to correct light pollution, you are multiplying when you should be subtracting, so at one intensity one can make it look good, but at other intensities it will be incorrect and color balance will be off. So to correct light pollution, and/or remove airglow from deep sky astrophotography, one should subtract. The methods described here use a better methodology with a twist to help not clip the low end.
Now open the curves tool and increase contrast (Figure 6a) by adding points on the curves function line as shown in Figure 6b. Whatever you do, NEVER, NEVER, NEVER move the upper right point, and rarely (and then only very conservatively) the lower left point in the curves tool. To do so will likely clip data. Moving those points is like moving the end point in the levels tool (which will also clip data) if you are not careful. To increase contrast, we need to move the sky background to lower values using a curve with greater slope in the region of values for that object. In Figure 6b, the sky is the big peak in the histogram shown in the curves tool. Moving the curve up on the right side of the histogram peak and lowing it on the left side pushed sky values to lower image brightnesses and increases contrast. The right side of the histogram peak represents brighter stars and the Milky Way. But we want to be careful to not move bright stars toward saturation, so I added the third point toward the upper end of the curve and pulled that point down so the curve deviation from the straight line was not as great. This keeps from destroying star colors. I then clicked the histogram OK box to apply the curve to the image.
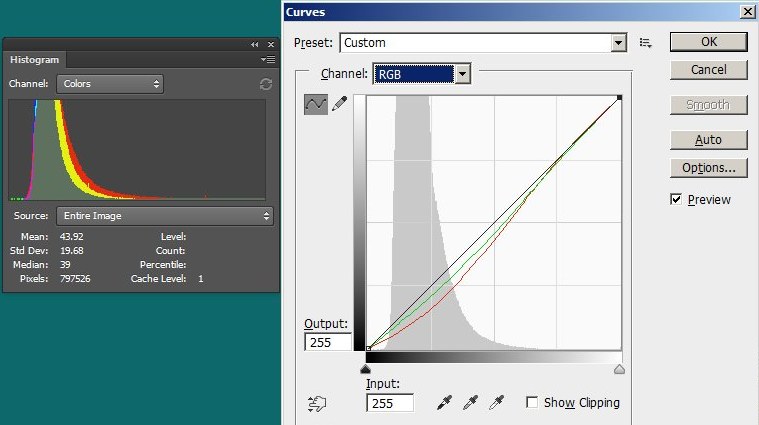
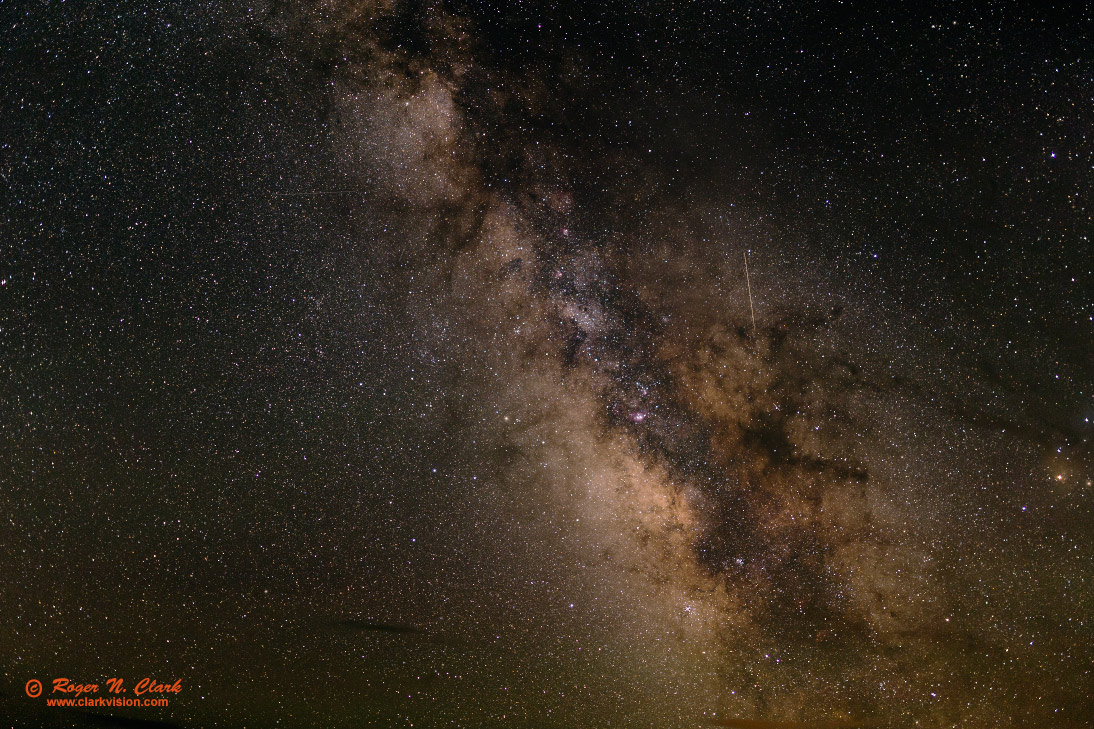
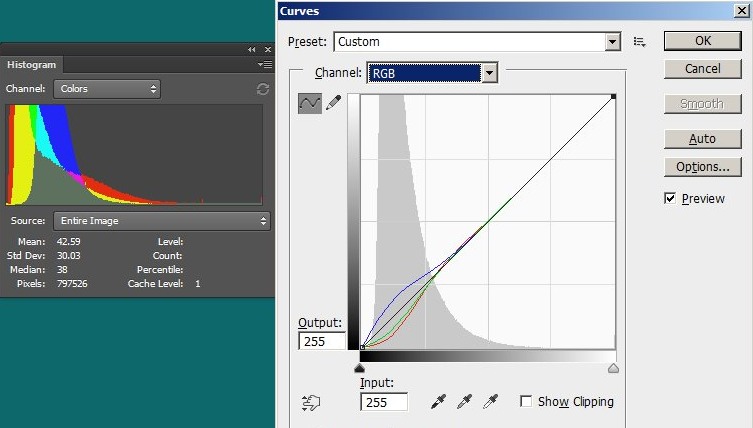
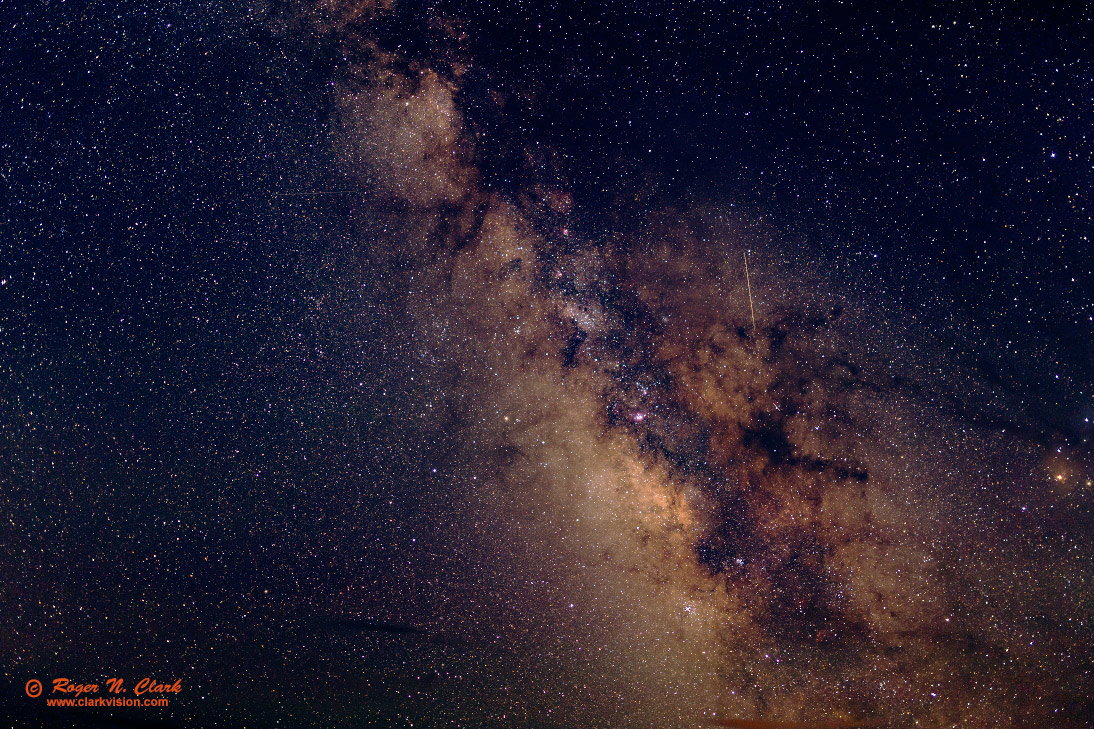
Now that we have an image with slightly more contrast, we need to reduce the red cast. Again use the curves tool (Figures 7a, 7b), but this time apply the curves to the red and blue channels. Note I tied the upper end so it follows the straight line, thus preserving intensities at the high end so I do not drive stars into saturation. The sky background is now a more neutral color. Toward the bottom half of the image, red and green banded airglow faintly shows. Click to apply this to the image.
Now to tweak the image to bring up more of the faint things and drive the sky background a little darker (Figures 8a, 8b). Use the same procedure as before. I work in small tweaks at each step. The rise of the curve at the mid point brightens those values in the image.
A small tweak is shown in Figure 9, a simple saturation enhancement of +15 in photoshop CS6.

A final secret: enhance contrast with star clouds using unsharp mask, radius around 30 to 50, amount 30 to 40. An example result is shown in Figure 10.
The processing comparison of my method and the seemingly popular the night sky is blue crown is shown in Figure 11. Which do you like better? The blue with all white stars is definitely not natural, and not what we see in the night sky when truly dark adapted and away from city lights.

The response to this article has been mostly positive, but there are photographers who still want a blue sky, and that it OK by artistic license. They advocate a compromise between tungsten and sunny (daylight) white white balance by using a color temperature of 3800 Kelvin. Here is my problem with such low color temperatures, both from a physics of the real world, and color perception view. Changing color temperature is a color balance change, which in the digital file is a multiplication. But this changes the color of everything in the image, including bright stars, intermediate stars and faint stars. We can perceive the color of many stars with our unaided eyes, and with binoculars or a telescope, many more, as we can gather enough light to see their color.
But there is a better way than color temperature to make skies blue without warping the colors of stars away from what we perceive. Below is a way to maintain a more natural look to the color of stars yet make a dark blue sky with artistic license. Again we'll use curves.
Light pollution, scattering from aerosols (haze), and airglow are ADDED light to the scene. Thus, if one wants to compensate for the effects of any of these processes in the night sky, the proper method is to SUBTRACT them from the scene. You can see the effects of the different processes in the raw converter: changing the color temperature moves the RGB histograms relative to each other. When I use 3800 K for the scene in the above examples, the bright side of the histogram has blue higher, and bright red stars like Antares lose most of their red/orange color, and definitely not what I can easily see in the night sky with my unaided eyes.
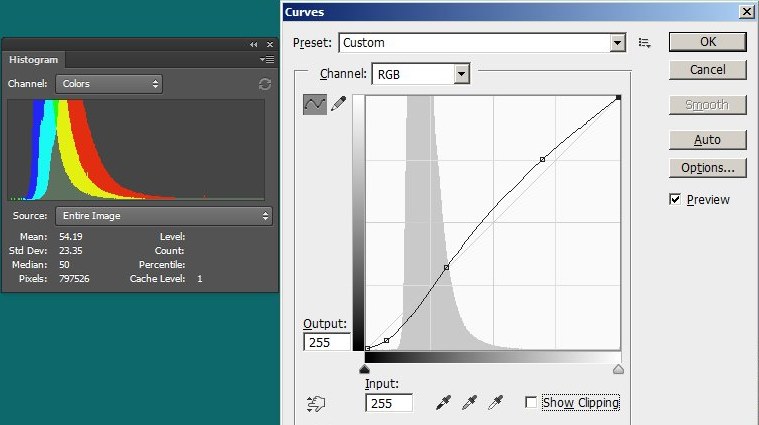
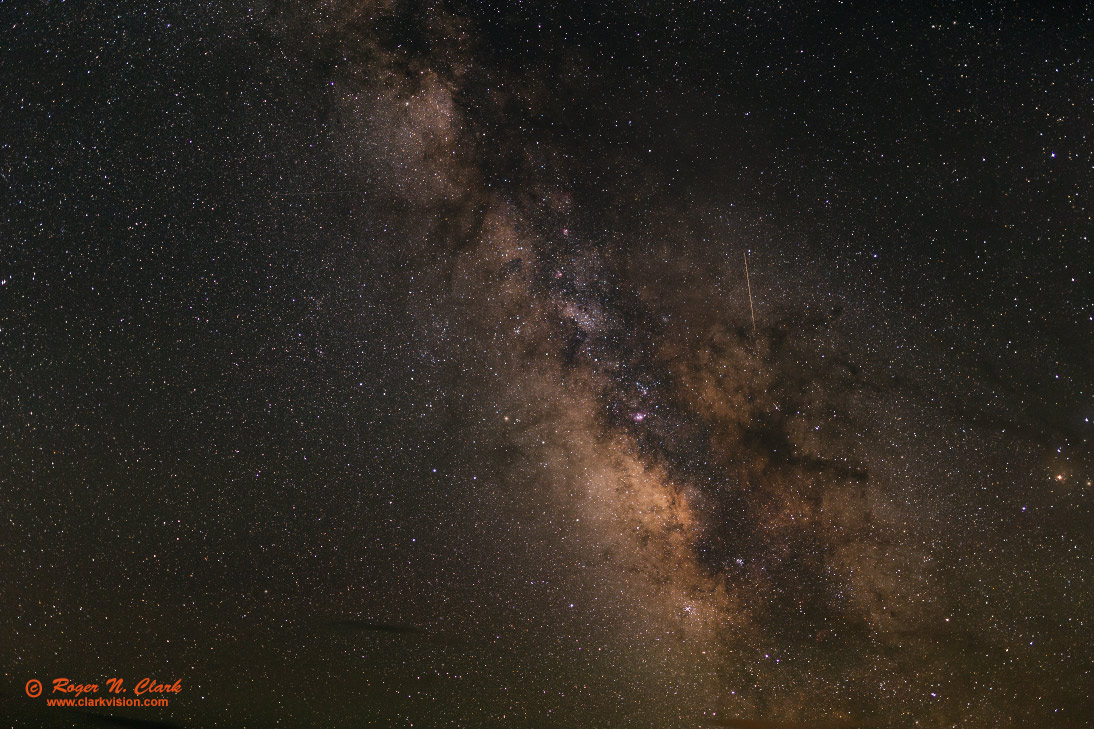
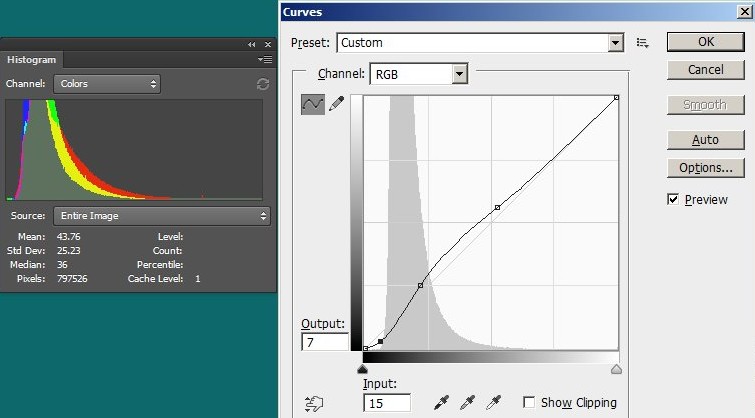
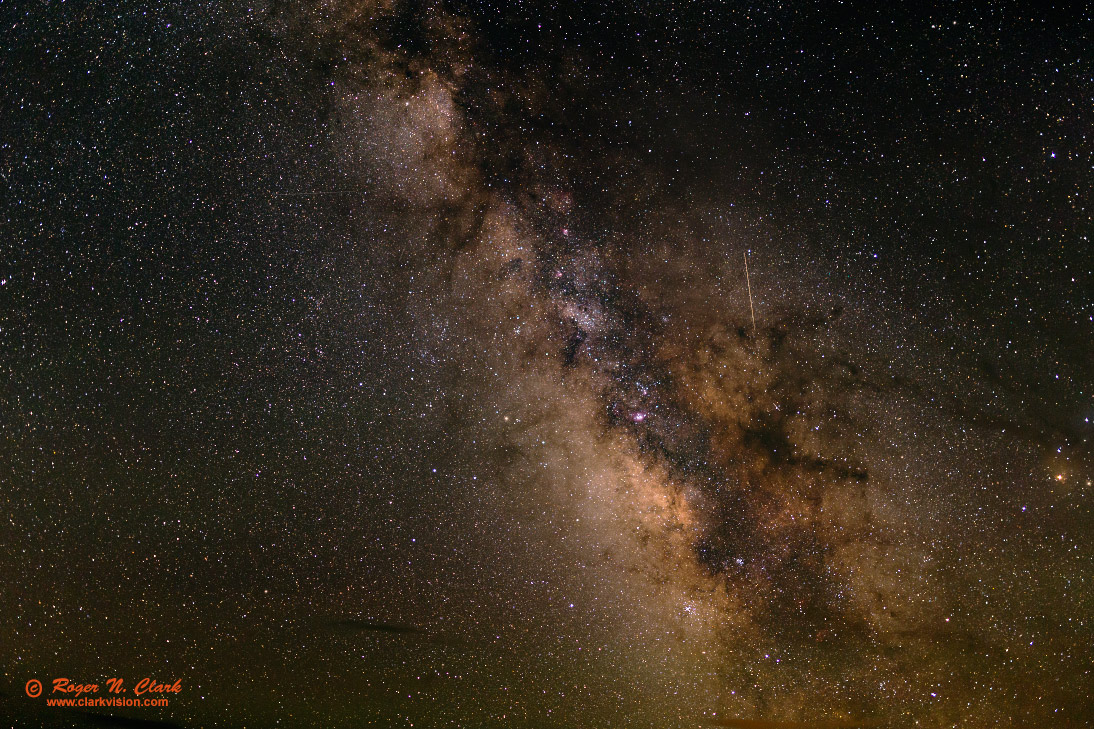
So to keep bright star colors they way we perceive them and to subtract light pollution, scattering from haze, etc, one should SUBTRACT light from the image. Do this by using curves to move only the left side of the histogram. Using the methods described above, I used curves on each RGB histogram to reduce intensity at the low for the red and green channels but raised it for the blue channel (Figure 12a). The resulting image, Figure 12b, maintains the colors of brighter stars and the brighter parts of the Milky way, but makes the dark night sky blue. Compare with Figure 10.
Night photography can reveal wonderful colors in the night sky, and those colors can be brought out with simple and very effective post processing methods. By using curves in post processing, one pushes the different intensities, effectively molding the image into somethings beautiful. Mold it, don't clip it or chop it off!
The use of curves in the localized methods described here is a refinement of the luminosity mask concept, but with easier and finer control over what luminosities are being affected. The curves tool with the background histogram combined with the RGB histogram provide effective guides to what needs changing. Simply pin the curves line (or each red, green or blue) line to the 45-degree line to prevent those luminosities from changing, and simply change the luminosities that you do want to change. Increase the slope where you want to increase contrast and decrease the slope where you want to decrease contrast. Curves luminosity "masking" is much simpler than the convoluted instructions one finds on the internet for luminosity masks (e.g. using photoshop) and gives you better and simpler control over your image. Using curves like this for luminosity masking works for all images, not just astrophotos.
References and Further Reading
Clark, R.N. (1990), Visual Astronomy of the Deep Sky, Cambridge University Press and Sky Publishing, (book of 355 pages).
Clarkvision.com Nightscapes Gallery.
The Night Photography Series:
| Home | Galleries | Articles | Reviews | Best Gear | Science | New | About | Contact |
http://clarkvision.com/articles/night.photography.image.processing
First Published August 24, 2014
Last updated May 4, 2015