ClarkVision.com
| Home | Galleries | Articles | Reviews | Best Gear | Science | New | About | Contact |
Processing Canon Raw Image Data to Maximize Dynamic Range
by Roger N. Clark
| Home | Galleries | Articles | Reviews | Best Gear | Science | New | About | Contact |
by Roger N. Clark
Raw image data from Canon's cameras have more dynamic range than what people commonly show on the internet. Canon raw data needs to be processed differently than Nikon raw files. Nikon's raw files have no bias (no offset). Canon's do, so that one can do proper statistics at the low end. Thus, to show proper dynamic range the offsets need to be properly managed. In this article I show an example of such processing.
A high dynamic range image with both a dark interior and bright sunny exterior scene is shown in Figure 1. The image was obtained with a Canon 6D camera with a 24-105 lens at ISO 200 at a hotel room in Greece. How would one bring out the details in the dark room? Follow the discussion below in Figures 2-10 to see the possibilities. I show a typical editing sequence that I might do. I do not claim it is the only or the best way, but it is quite effective.
Canon raw data typically have an offset of 2048 in the 14-bit data range in the raw file, with a maximum of around 15,000. That means the offset is about 15% of the data range. In other words, the offset is less than 3 stops down from maximum signal! Managing this offset is critical to showing the full dynamic range of the sensor. Many examples shown on the internet fail to manage this offset properly and conclude that Canon has poor dynamic range. Further, as raw processing proceeds in the RGB data, the relative offsets can be changed, leaving ugly color casts in shadows at the low end of the intensity range. This article describes how to mitigate this problem.
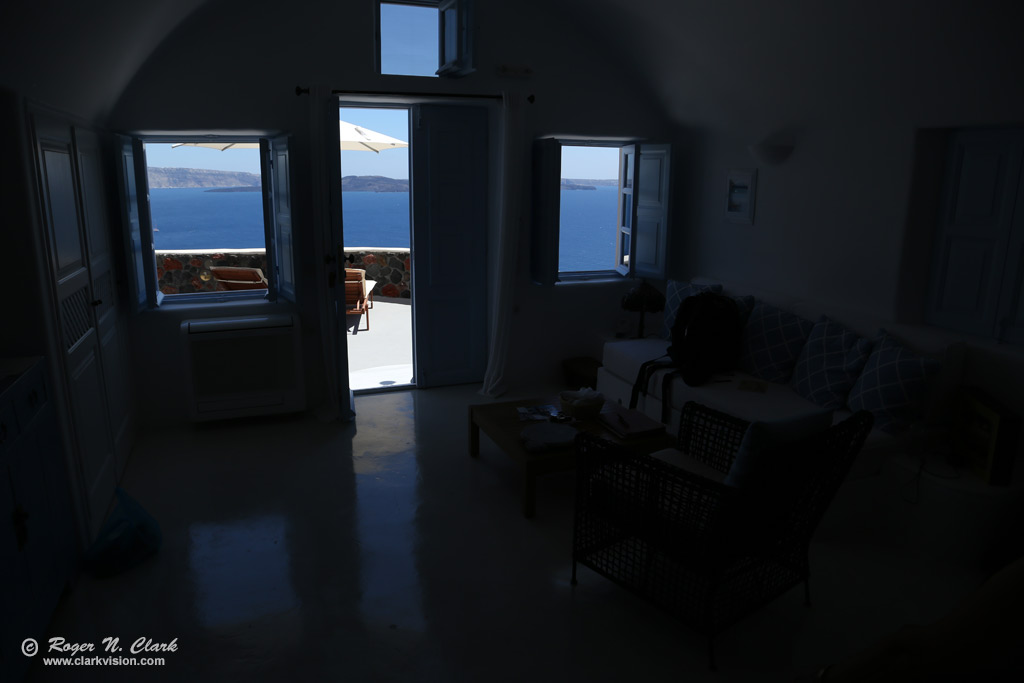
Figure 1. Out of camera jpeg.
Using minimal settings in Adobe Camera Raw 8.7 raw converter, Figure 2, to produce a 16-bit tif file, then using Photoshop and shadow/highlight and levels tools, one can produce the image in Figure 3. The interior looks rather flat.
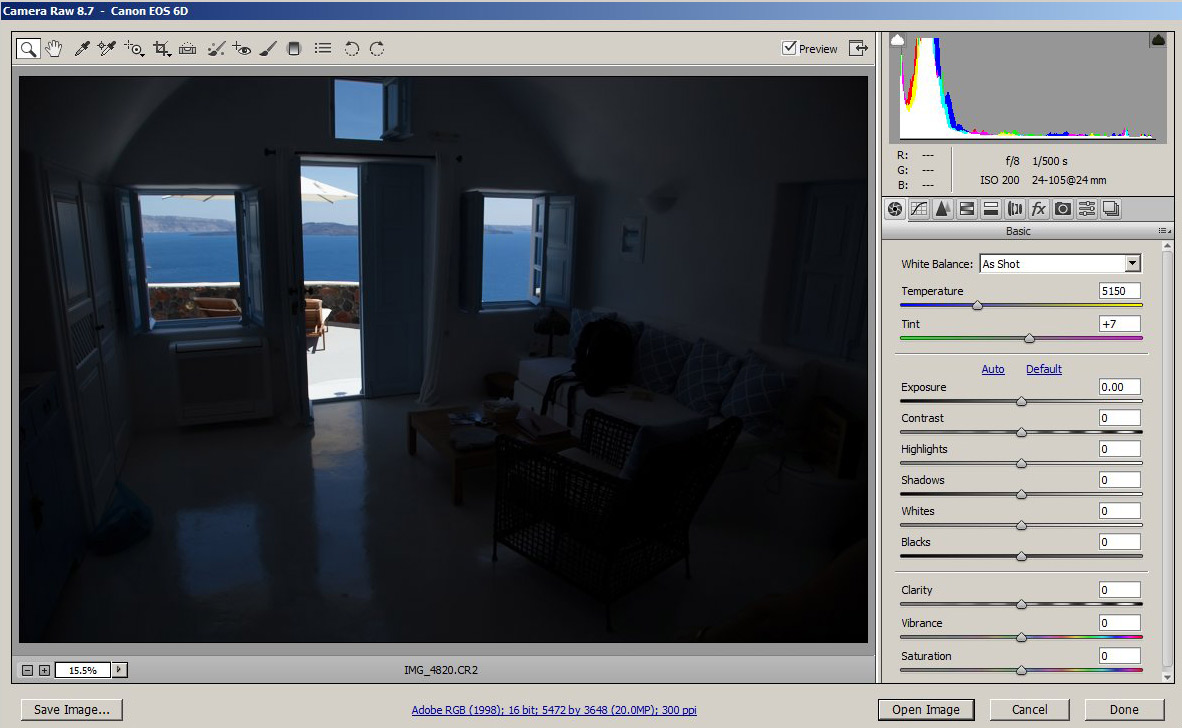
Figure 2. Raw conversion with minimal settings.
Note how the histogram is blocked up on the left. That is bad
for extracting maximum dynamic range.
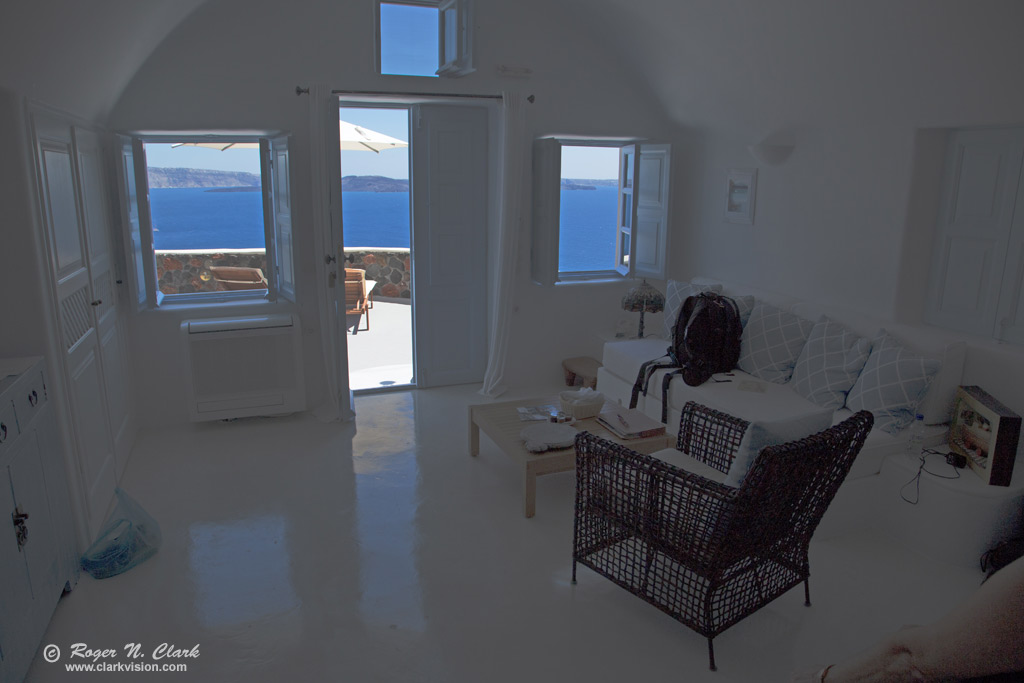
Figure 3. Raw converted image data from Figure 2 with
shadows lifted. Result is poor color and blocked up low end
giving the impression of poor dynamic range.
A better set of processing steps is shown in Figures 4 - 8. Note that the curves work shown below is like that with luminosity masking, but with less complications and finer control.
Raw converter settings are illustrated in Figure 4 and 5.
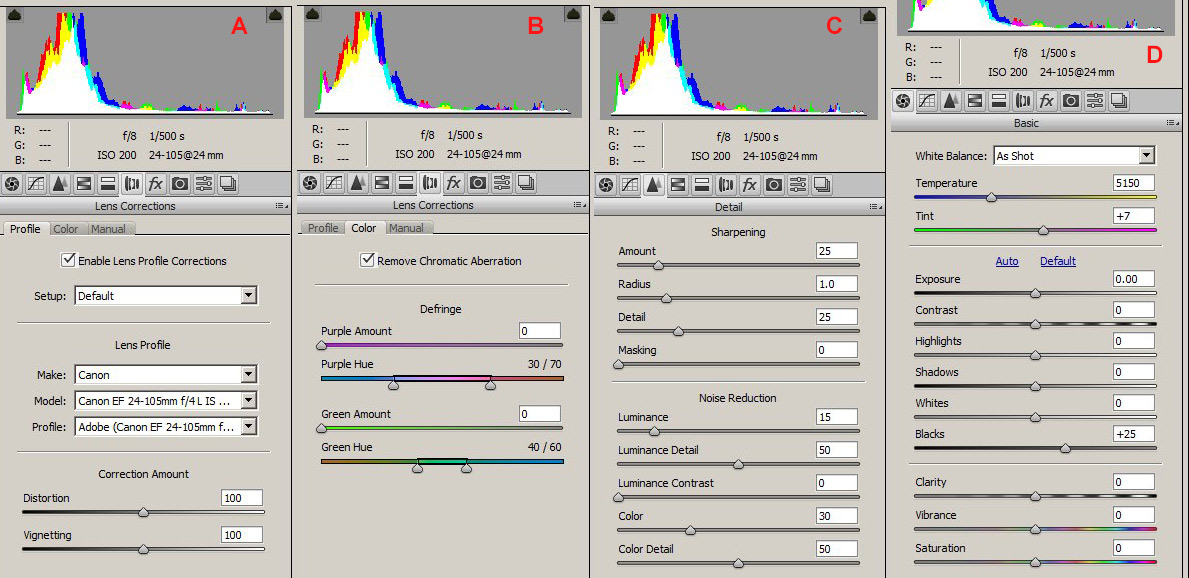
Figure 4. During raw conversion, do:
A) Lens profile corrections.
B) Remove chromatic aberration.
C) Sharpening and noise reduction.
D) Offset the low end so that no data get clipped. In this case
Adobe Camera Raw 8.7 needed a setting of +25 to make sure no
data were clipped.
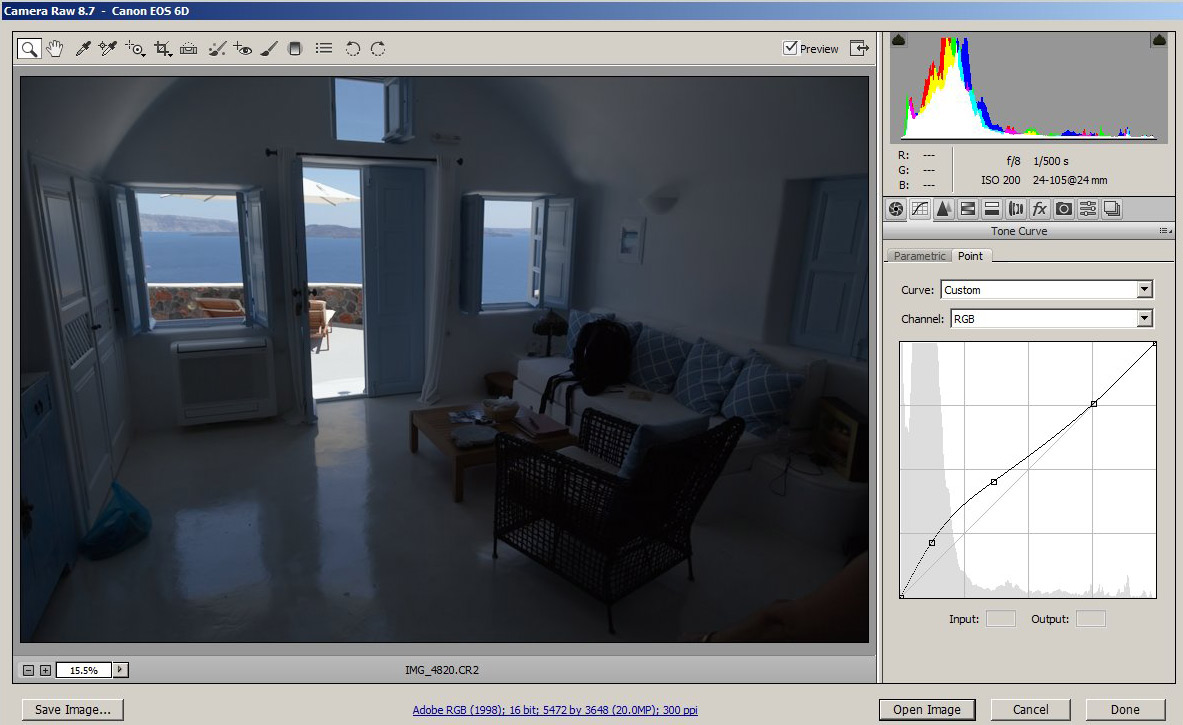
Figure 5. The next step in the raw converter is to bring up the shadows
in the low end. Note the low part of the histogram is separated
from the right side. Note too that the left most peak
in the histogram, near the left edge, has red peak higher than
the other colors. That means the shadows will show a red cast
and is due to the raw converter boosting the offset too much in the
red channel. This will be fixed in the next steps.
Raw converter setup is complete, so save the file as a 16-bit tif and open in the image editor for the following steps (Figures 6 - 8).
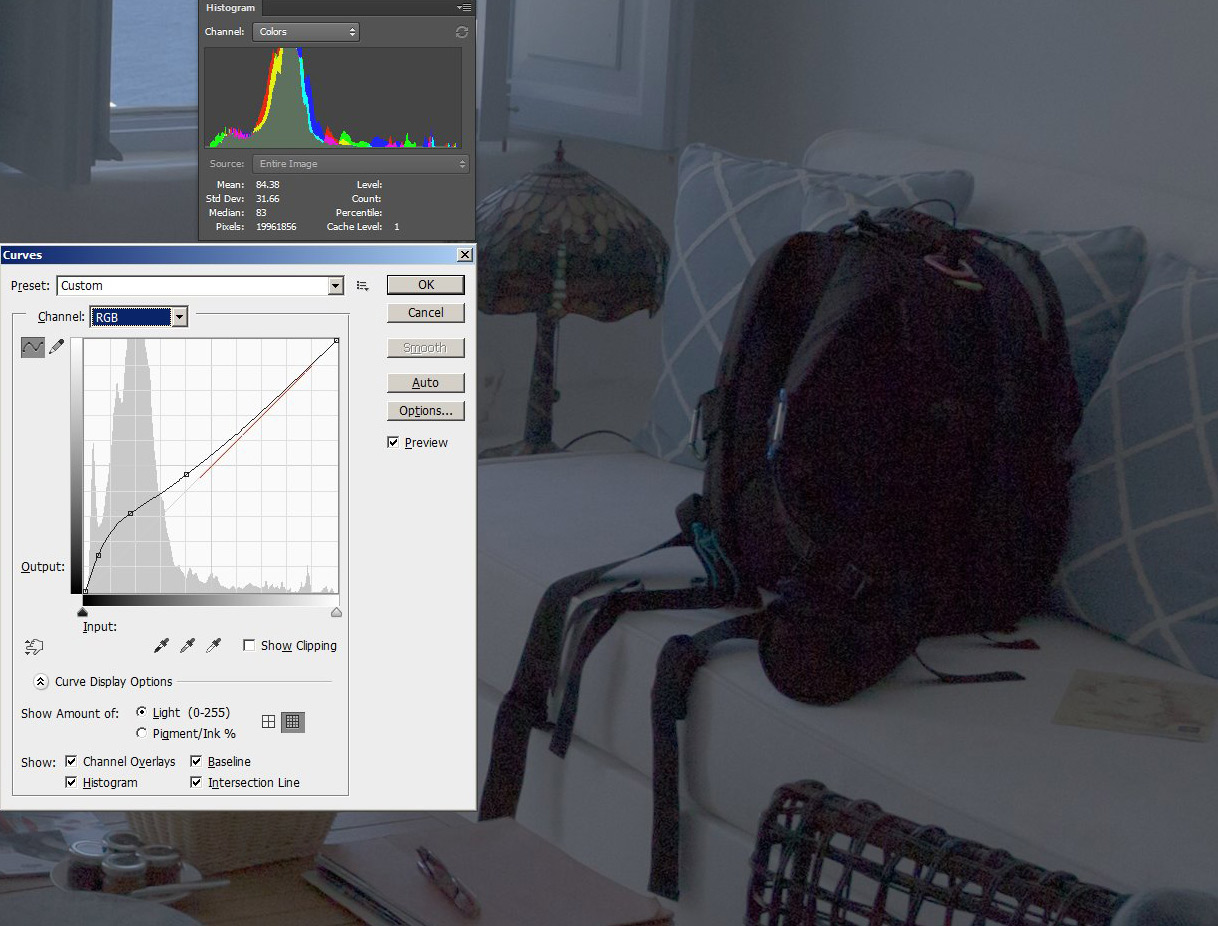
Figure 6. Now in the image editor, Boost the low end with curves.
The offsets are now showing and do not look very good.
The red channel, in particular, is too high at the low end, creating
red "blotchiness" in the darker areas.
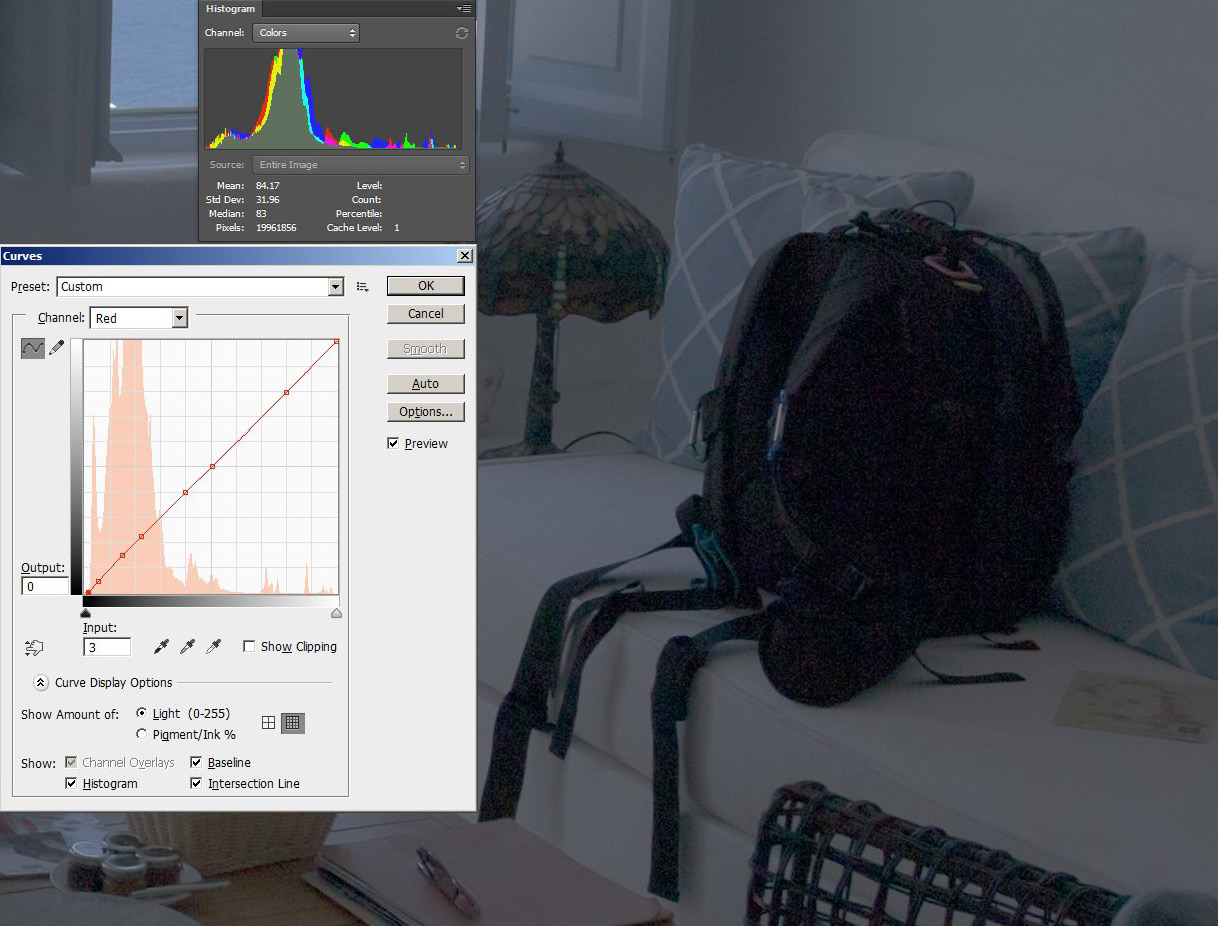
Figure 7. Next using the curves tool, pin the red channel
high values so that output = input, then lower offset at the base.
In this case, an input of 3 (on a 0 to 255 scale) is set to zero.
An editor that shows 16-bit values would be better and enable finer control.
The next point up was set to: input=13, output=11. All other points
had input = output. Note the small peak in the histogram
at the low end now better aligns with the other data.
The final image after several tweaks is shown in Figure 8, and a detailed comparison between the result in Figure 8 and 3 are shown in Figure 10.
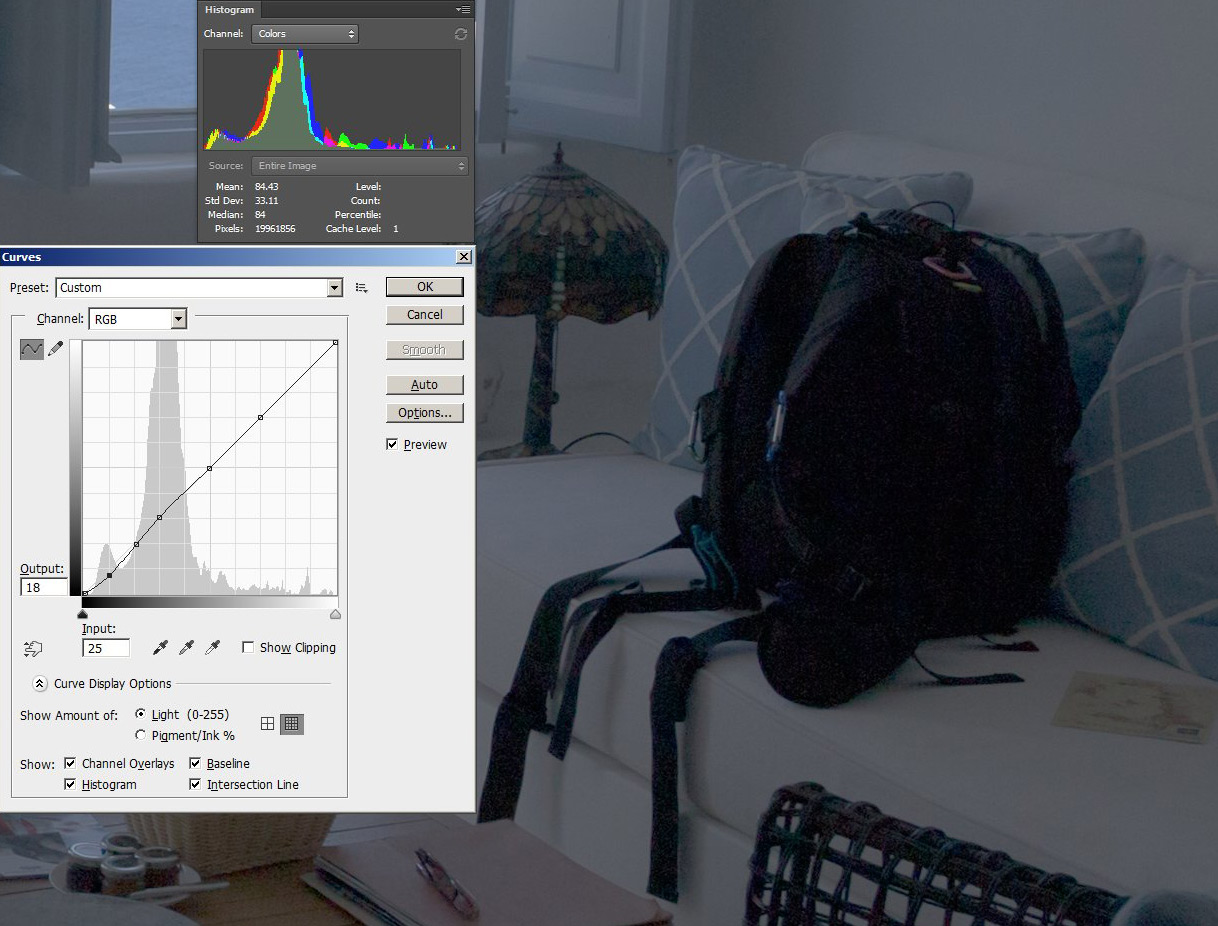
Figure 8. This step reduces the low end a little to push the remaining
offsets lower and increasing contrast in the low end. Note how colors are showing better.
A couple of more iterations of curves pushing the low end around improves the image further
(Figure 9). Note the lower left point is not adjusted further to prevent
clipping. Only points are added near the bottom of the transfer curve
and moved down to push the low end lower. That compresses noise at the bottom
reducing apparent noise without clipping it.
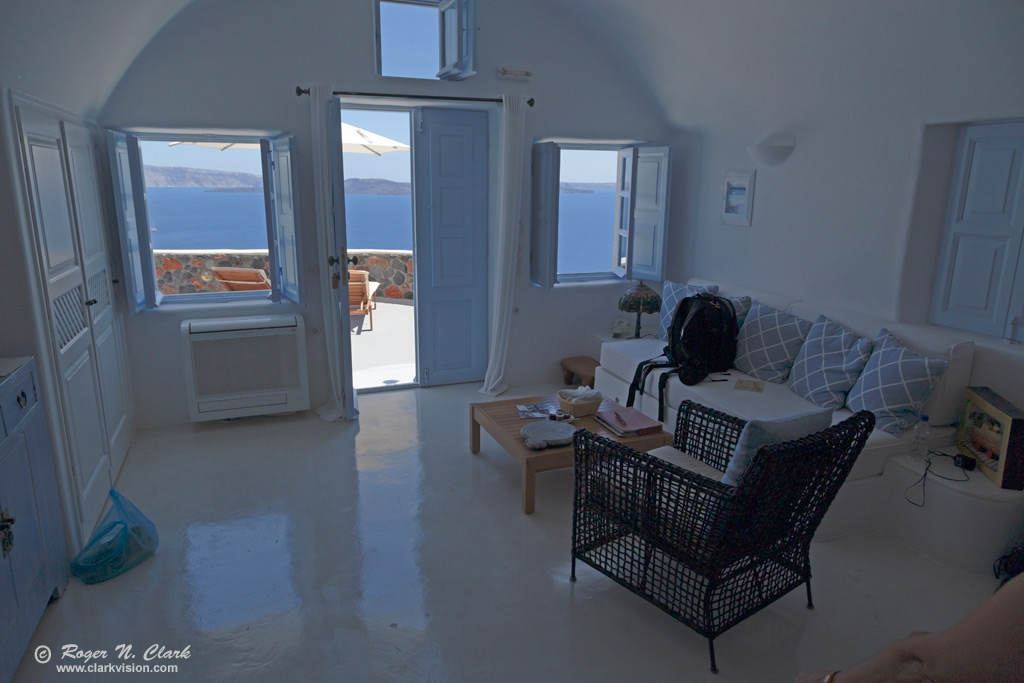
Figure 9. Final image after raw processing and 16-bit image editing.
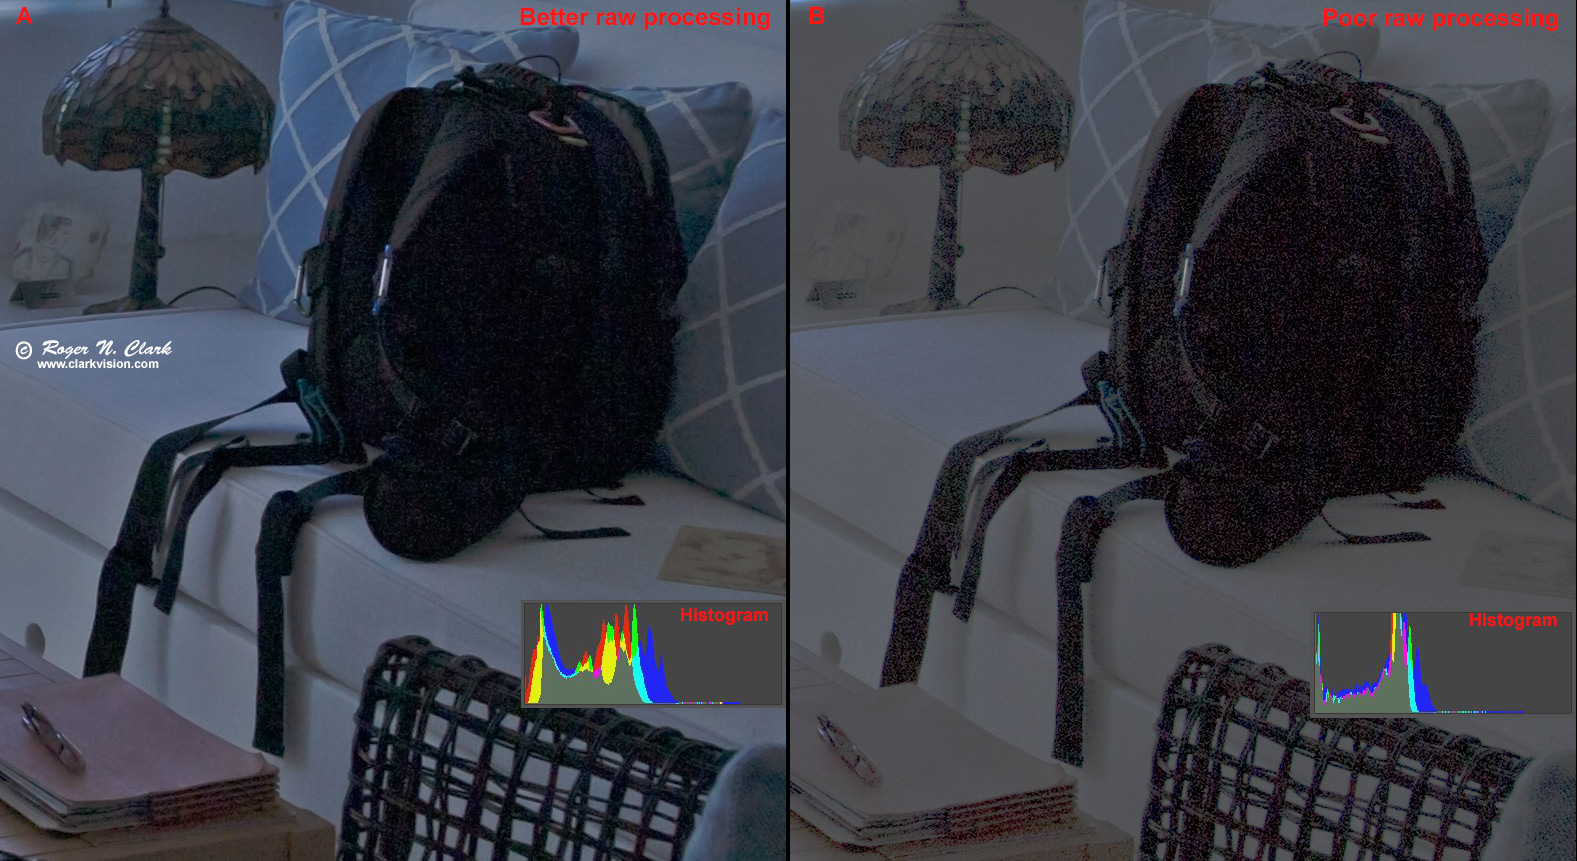
Figure 10. Comparison of the final image with processing to bring out the
dynamic range and suppress noise (A, on left) with simpler processing that leaves
offsets that vary with color resulting in ugly shadows (B, on right).
The histogram insets show the histograms for the portion of the image shown and not
the entire image. Note the improved color and detail in the lamp in panel A.
Discussion
Notice the differences in the histograms in Figure 10. The left histogram is smooth while the right one is ratty at the low end and blocked up on the left side, indicating clipping and gross quantization leading to the poor look in the shadows. With better processing methods illustrated here, one can manage the offsets present in Canon's camera raw data files to bring out the full dynamic range that the sensor records.
Part of the problems in digging out the dynamic range is due to the image editing programs. Photoshop, for example, clips data at zero. If the image editors would handle negative numbers I believe we could produce better images without fear of clipping the low end during processing.
Processing Canon raw data similar to the above to manage offsets shows the full dynamic range of the camera and makes results similar to Nikon images which do not have offsets to deal with. Comparison Between Nikon and Canon Raw processing
Dpreview posted a review of the Canon 7D mark II and compared an image from it to a Nikon D7000 image of the same scene HERE. I believe the differences in the two images are mainly examples in differences in post processing the raw files, and not indicative of the sensor dynamic ranges. Dpreview made the Canon raw file available and I process it is and posted the results to the dpreview discussion thread on the 7D2 review. My processed image comparison is HERE. You can plainly see that the 7D2 image is now much closer to the Nikon image.
Canon raw data needs to be processed differently than nikon raw files. Nikon's raw files have no (or very little) bias (offset). Canon's do, so that one can do proper statistics at the low end. Thus, to show proper dynamic range and good shadow detail the offsets need to be properly managed. The example on dpreview seems typical of processing where the low end is boosted without properly accounting for offsets, resulting in unequal offsets in each color and ugly shadows.
The offset in the Canon raw data file is 2048 on a 14-bit scale. The 14-bit range is 0 to 214 - 1 = 16383, but that peak is not quite reached. 2048 is 211 so less than 3 stops from maximum, and with a 12-stop dynamic range, than means 2048 is on the order of 9 stops above the noise floor!!! It is the extreme offset (some 9 stops above the noise floor) that makes post processing such a challenge for Canon raw data, resulting in reviewers and photographers thinking the canon sensors are worse than they really are. But with good post processing methods, Canon sensors, especially recent models, are very good at both low and high ISOs.
| Home | Galleries | Articles | Reviews | Best Gear | Science | New | About | Contact |
http://clarkvision.com/articles/does.gear.matter
First Published December 14 2014.
Last updated October 25, 2015.