ClarkVision.com
| Home | Galleries | Articles | Reviews | Best Gear | Science | New | About | Contact |
Linux for Photographers Part 2: The Linux Mint Mate Desktop
by Roger N. Clark
| Home | Galleries | Articles | Reviews | Best Gear | Science | New | About | Contact |
by Roger N. Clark
Linux Mint Mate desktop is easy to use with great capability and functionality.
Linux for Photographers:
The linux Mint Mate Desktop
This page gives examples of the Linux Mint desktop with the Mate interface. Specifically, this is Linux Mint version 14 on the laptop I carry to the field on photo trips. Figure 1 describes the boxes in the panels. The default installation includes only one application panel (on the bottom) and only 1 workspace defined. Right click on the application panel and a menu comes up where you can add a second panel and add things into the panel. The panels need not be top and bottom; they can also be on the sides if you prefer.

Figure 1. Example Linux Mint with Mate desktop.
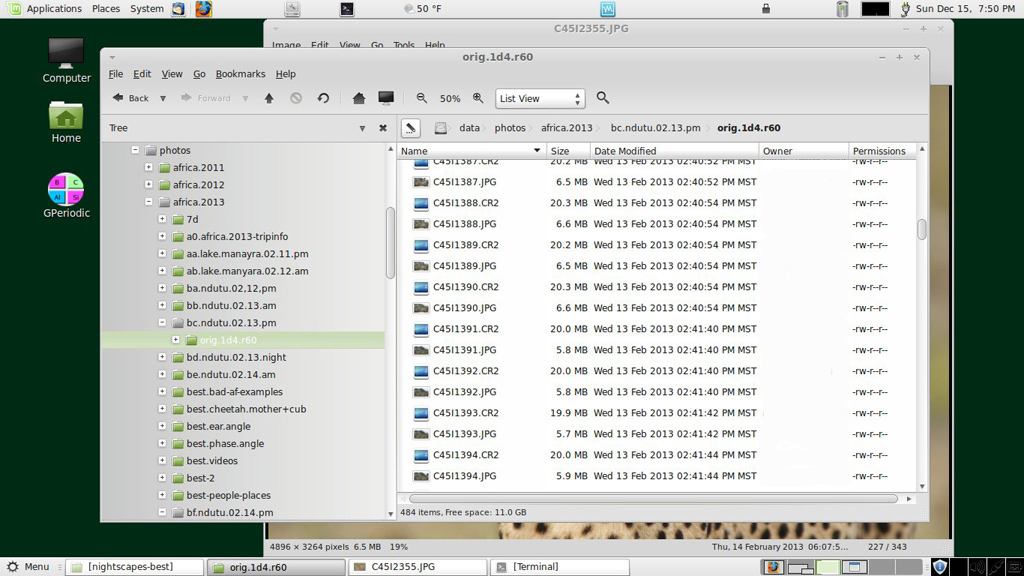
Figure 2. Example file browser with list view. What columns
are displayed are customizable.
The owner field was erased in the figure to reduce spam
to that user.
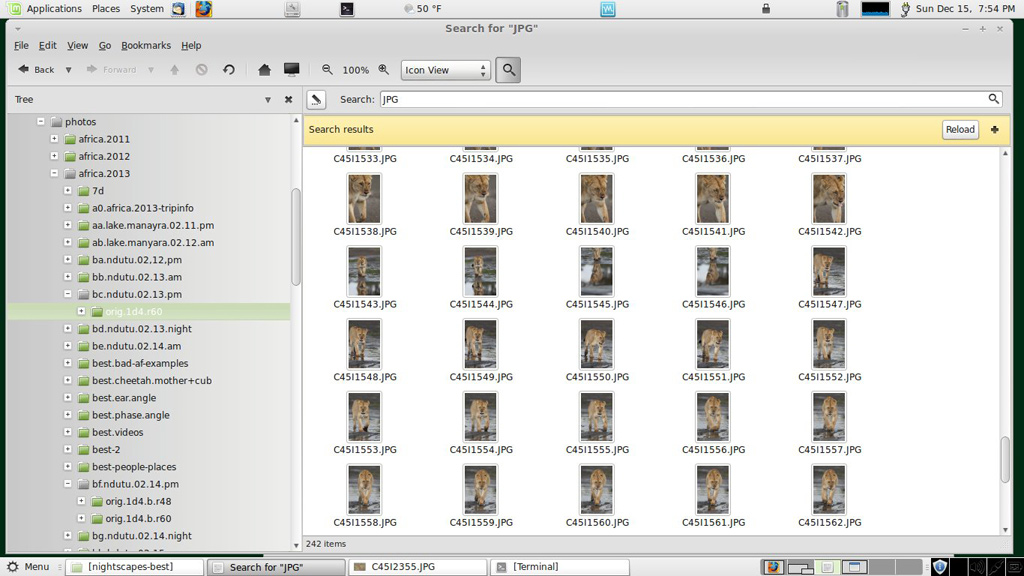
Figure 3. Example file browser with icon view.
The size of the icons can be change with the zoom feature, and
switching between icon and list view is quick with the icon
button.
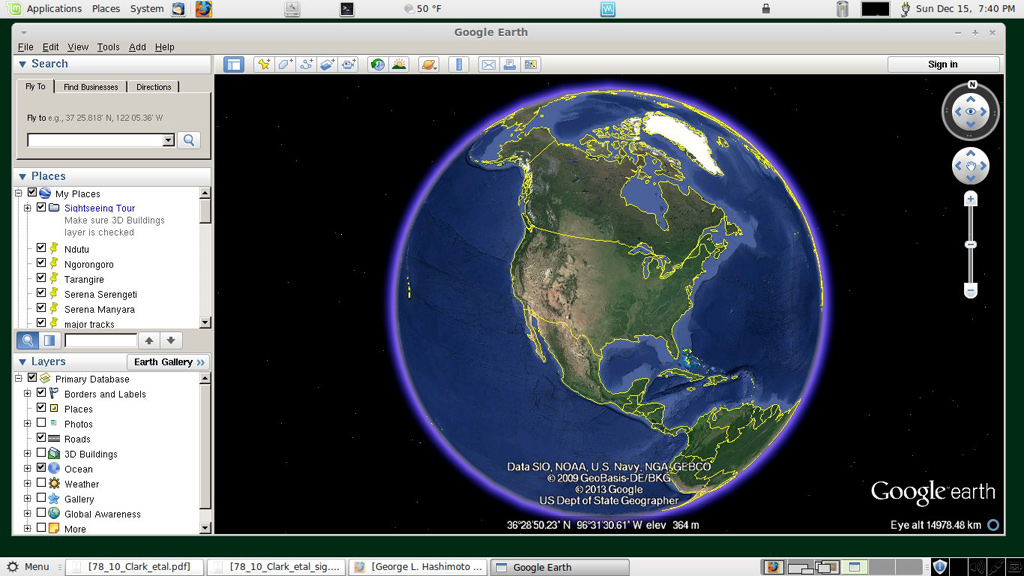
Figure 4. Example switch to workspace 4. In this workspace,
I started Google Earth.
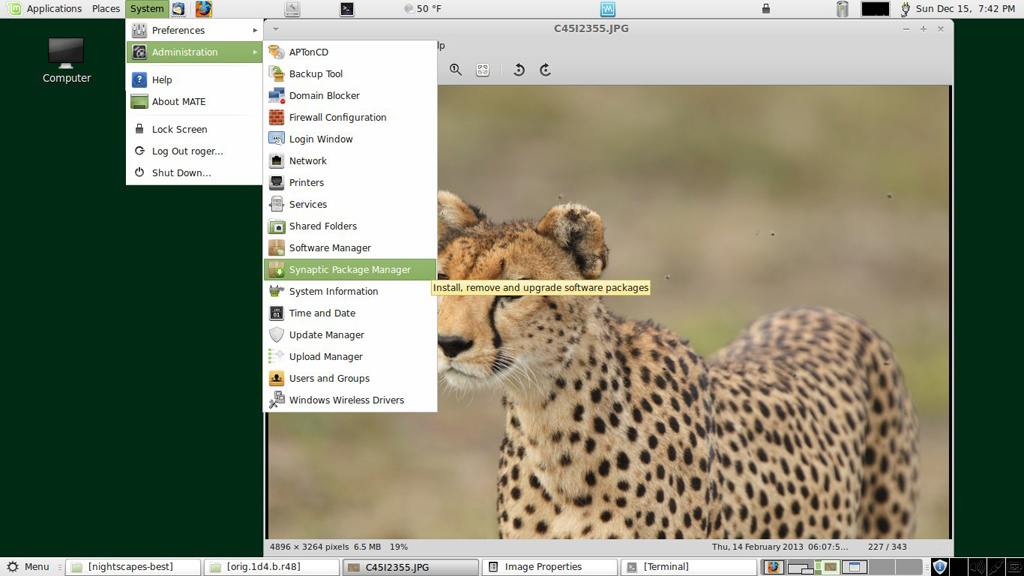
Figure 5. The System menu. Here the Synaptic Package Manager
is selected. The Synaptic Package Manager allows very easy installation
(and removal) of programs.

Figure 6. The Application menu. Here, Libreoffice word processing
is selected.
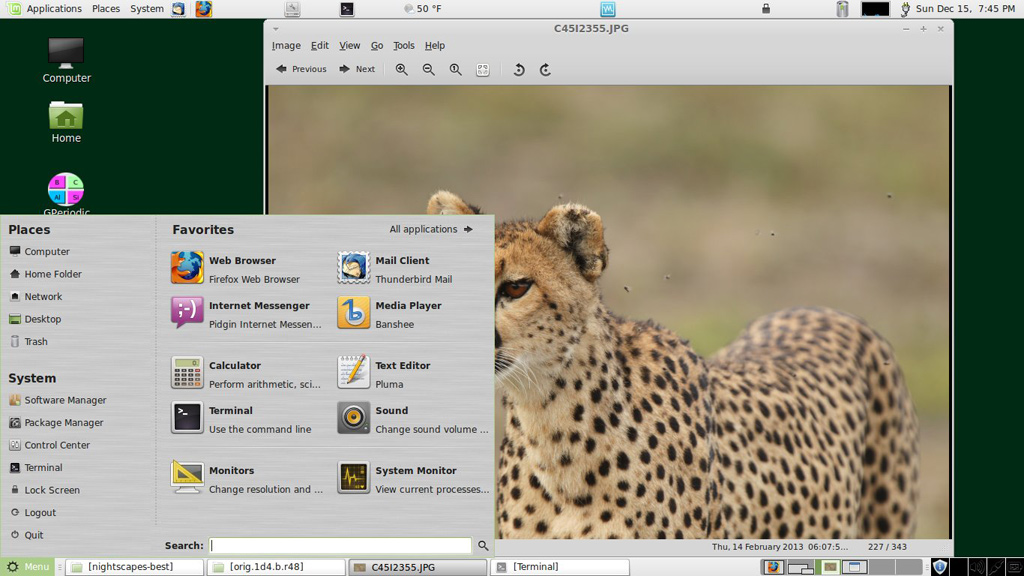
Figure 7. The Mint default menu. This is more like Windows 7,
which I don't like because if a program does not appear on
this menu, one goes to all programs and then one must scroll through
a huge list. I find the applications menu in Figure 6 more efficient.
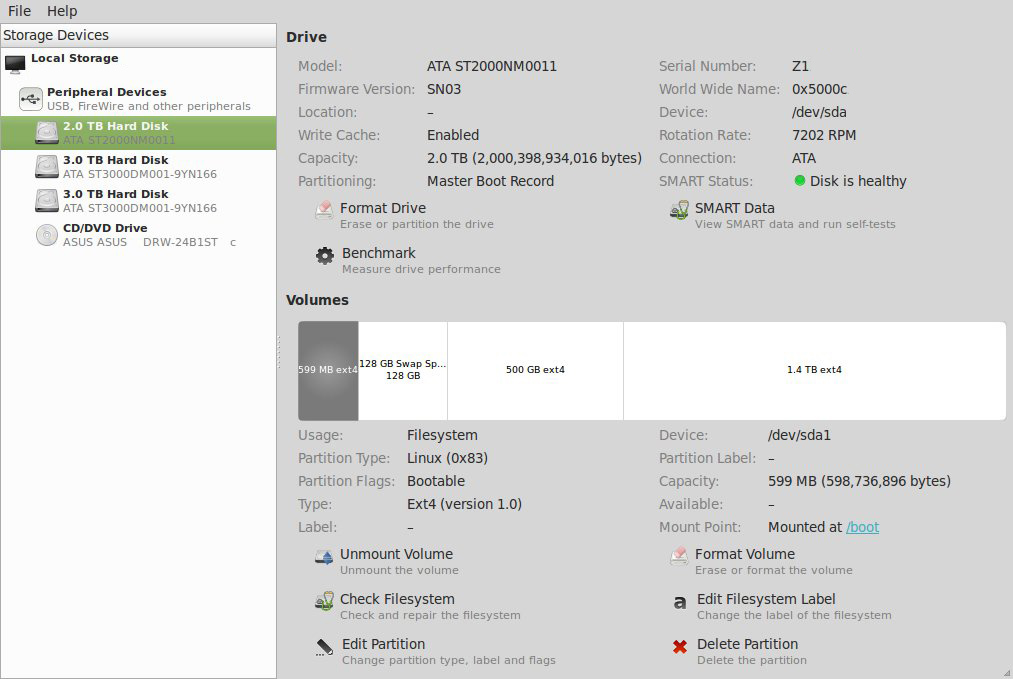
Figure 8. The disk utility. Shown is the system disk on my
desktop. Notice the "disk is healthy" green dot. The system
continually monitors disk drive health and alerts you to
problems. This has saved my data when a drive started to fail:
I copied all the data to another drive before failure.
Clicking on the Smart Data gets a full report on the
disk drive.
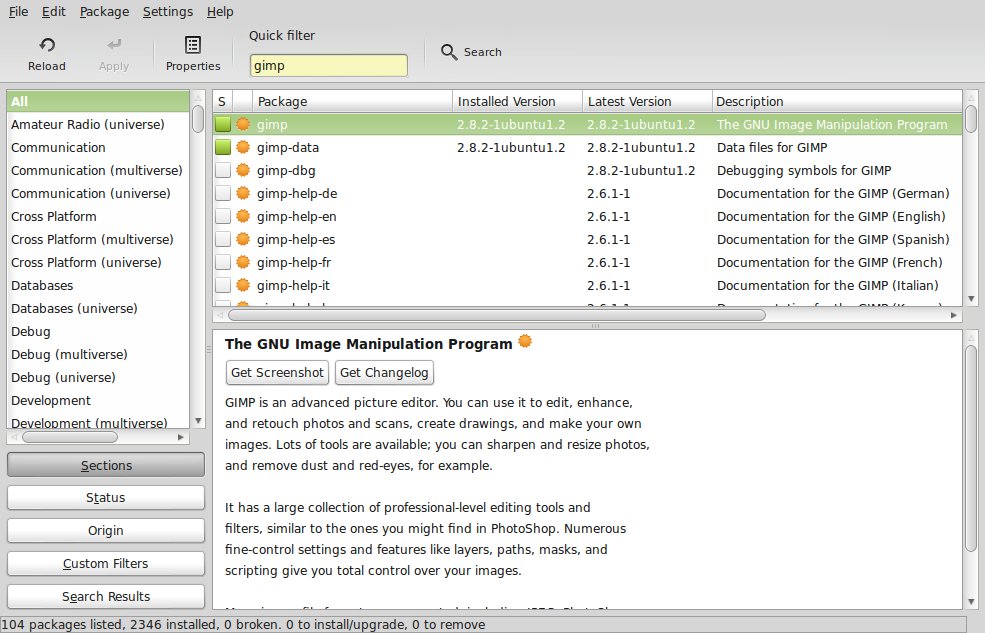
Figure 9. Synaptic Package Manager. Installation is as simple
as click on a package, select install from the pop-up
menu and then click apply. Uninstall and reinstall are
equally easy. The green square by Gimp shows that it
is already installed.
Linux for Photographers:
| Home | Galleries | Articles | Reviews | Best Gear | Science | New | About | Contact |
http://www.clarkvision.com/articles/linux.for.photographers.part2
First Published December 15, 2013
Last updated October 25, 2014.