
Changing Lenses on DSLR Cameras to Minimize Dust Contamination
by Roger N. Clark
All images, text and data on this site are copyrighted.
They may not be used except by written permission from Roger N. Clark.
All rights reserved.
Are you concerned about getting dust on your DSLR sensor when you change lenses?
Below is the method I use to change lenses. I minimize the time a lens is
off the camera, thus minimizing both the pathway and time for dust to enter
the camera body. Using this method for several years with multiple
DSLR bodies, I have found very little dust problems, despite changing lenses
often in dusty environments, from the Serengeti of Africa to deserts
of the American west, to dusty construction environments. Typically, I find
that I have to only clean my DSLR sensors every few months, for a hand full
of times per year. A simple blower almost always does the cleaning job.
The series of pictures below illustrates a lens change, with the camera
hanging around my neck. Similar lens changes can be done with the camera
on a tripod.
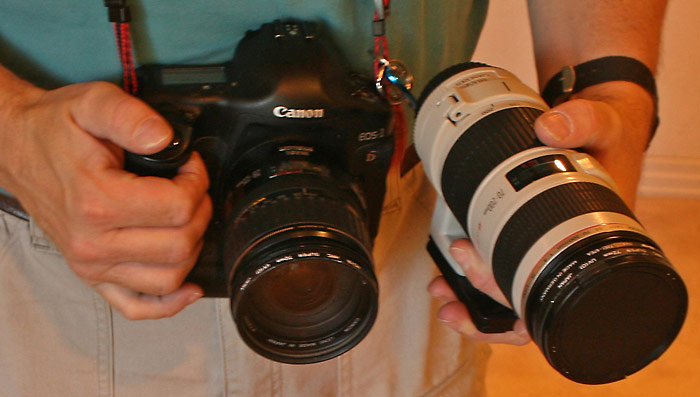
Figure 1. Prepare for the lens change. The camera is safely
hanging around my neck. The second lens is firmly grasped in one hand.
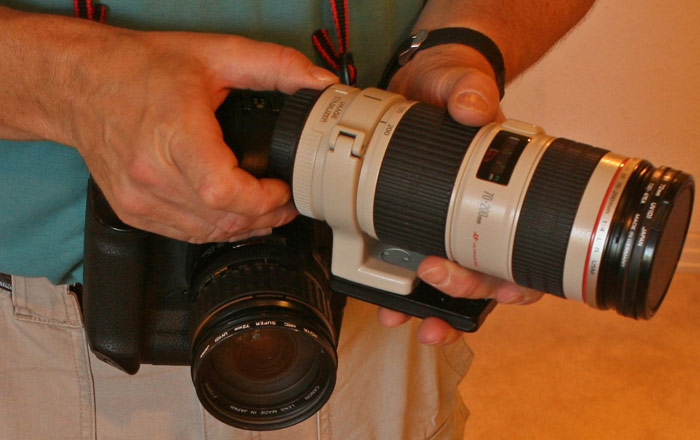
Figure 2. Remove the rear lens cap of the lens to be installed
on the camera.
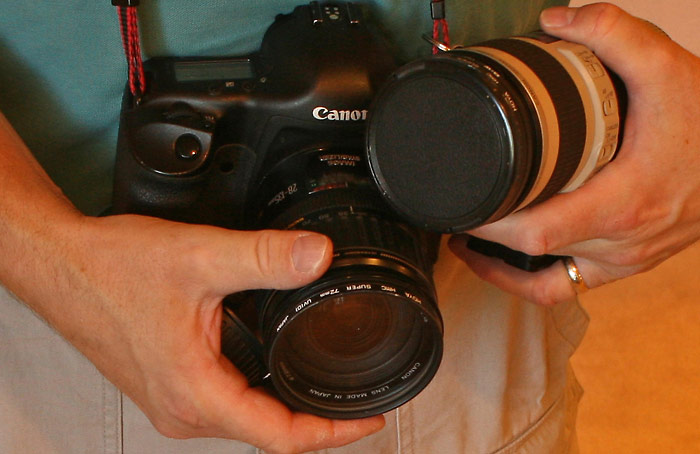
Figure 3. With one finger on the hand holding the lens, push the button that
releases the lens on the camera (in this figure, the hand on the
right side of the picture is pushing the button). Your second hand
grabs the lens to be removed. Note the rear lens cap held in one hand.
I usually put the lens cap in the hand that is handling the smaller lens.
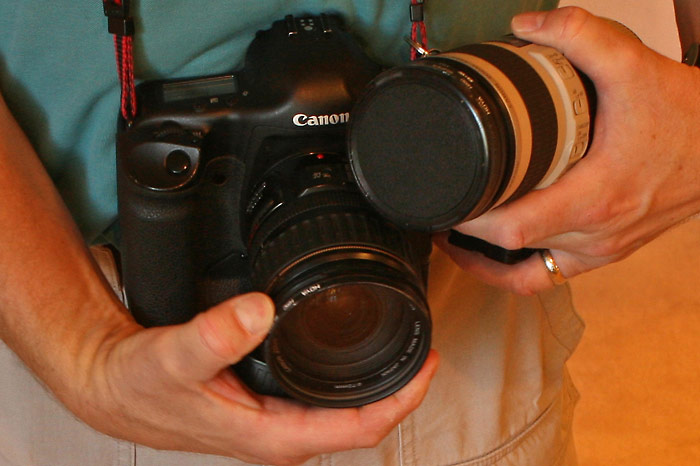
Figure 4. Twist the lens on the camera to rotate it into position where
it can be removed from the camera (the red dot above the lens center
indicates that position).
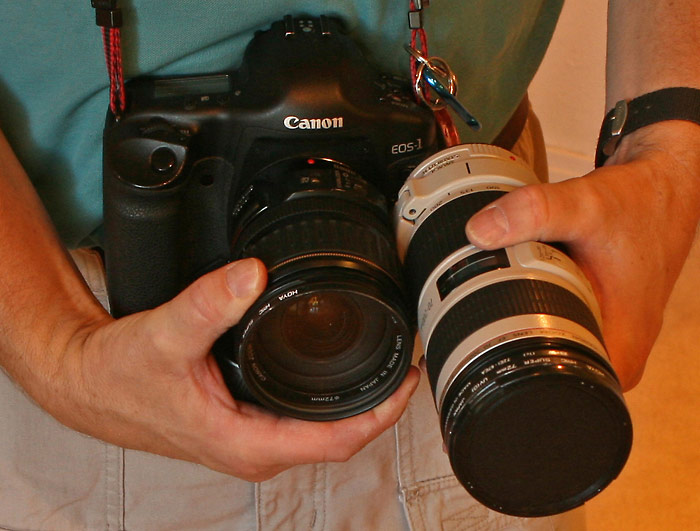
Figure 5. Now release the button that you were pushing and move the new lens
into position beside the lens on the camera. Have the red dot up
so the lens is ready to fit into the bayonet.
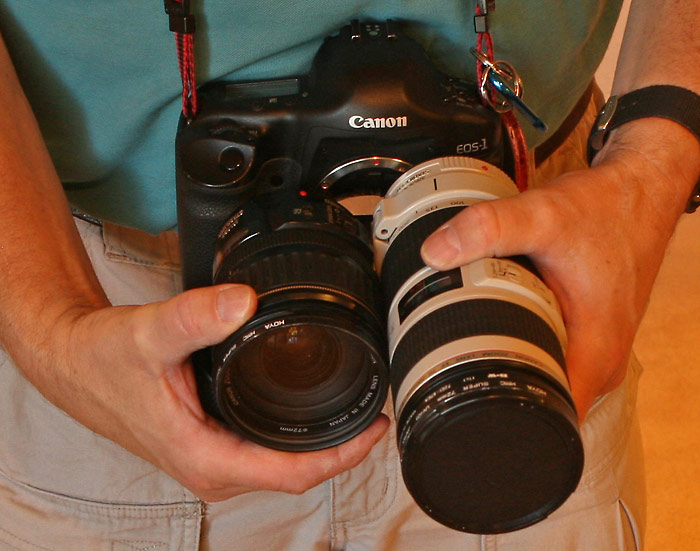
Figure 6. Now move the old lens out of the bayonet and slide to one side,
while moving the new lens into position.
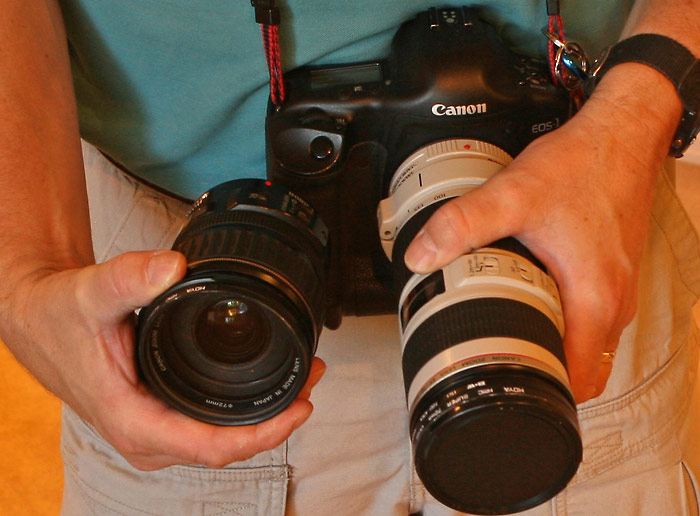
Figure 7. Next push the lens into the bayonet. The total time the interior
of the camera is exposed is on the order of only a second or two, once you
have some practice.
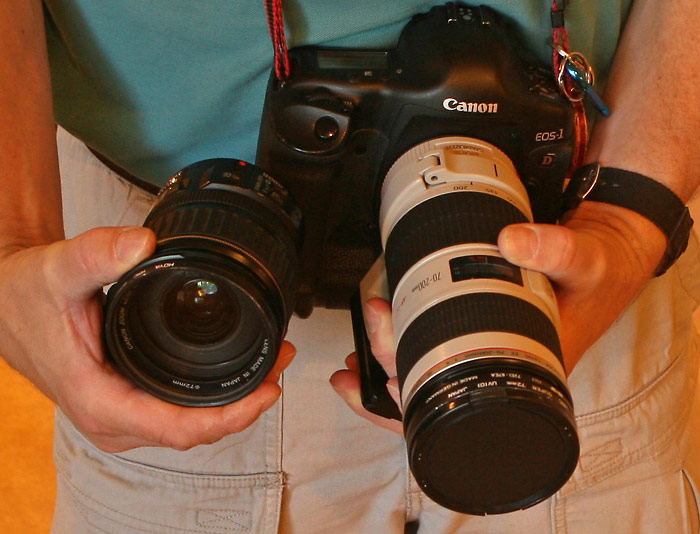
Figure 8. Twist the new lens to lock the lens into the bayonet.
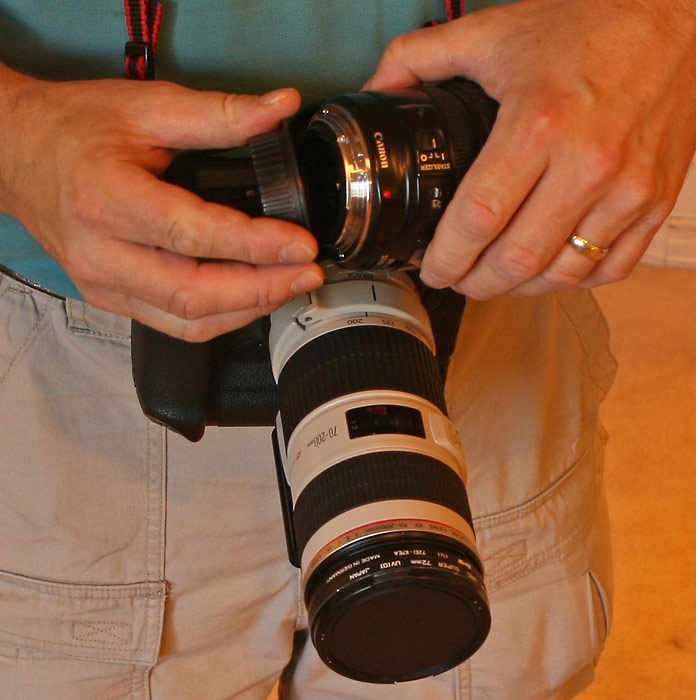
Figure 9. Now put the rear lens cap on the lens that was just removed from
the camera.
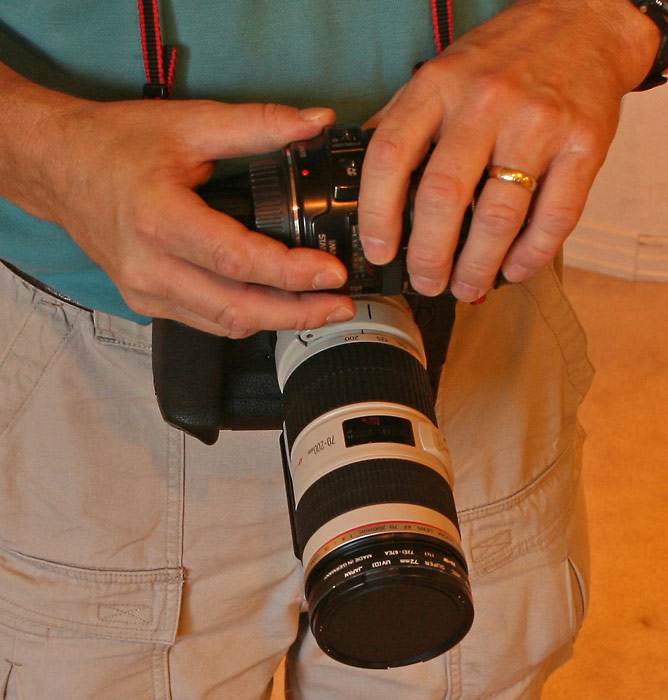
Figure 10. Switch hands if more comfortable.
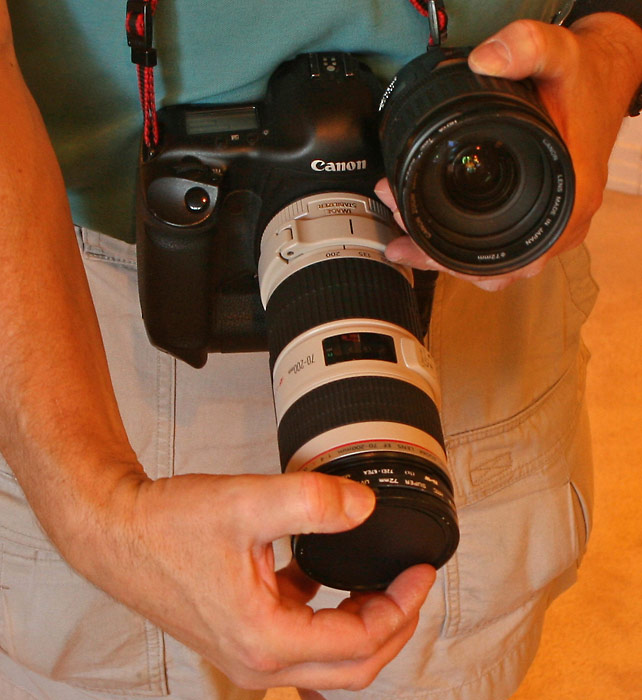
Figure 11. Next, remove the front lens cap.
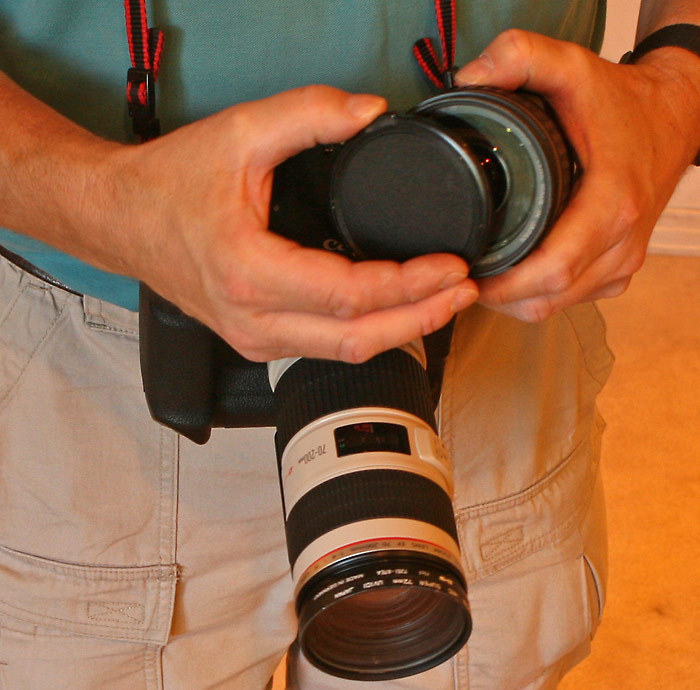
Figure 12. Then put the lens cap on the old lens. I standardize my
lens caps were practical by using step-up rings. In the lenses shown,
step up rings bring the filter thread size to 72mm. This speeds operation
in the field and also reduces the need for additional filters. With fewer
filter sizes, it also makes it faster and easier to find the correct
filter size in the field.
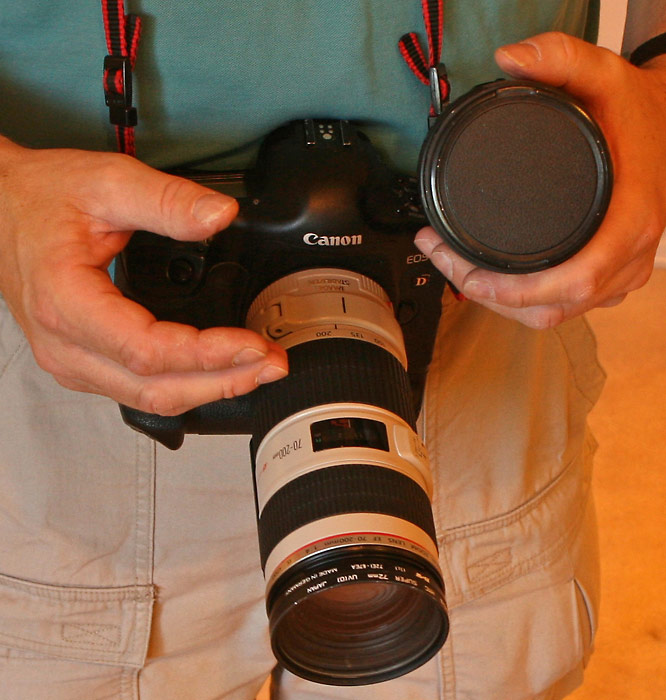
Figure 13. Operation complete.
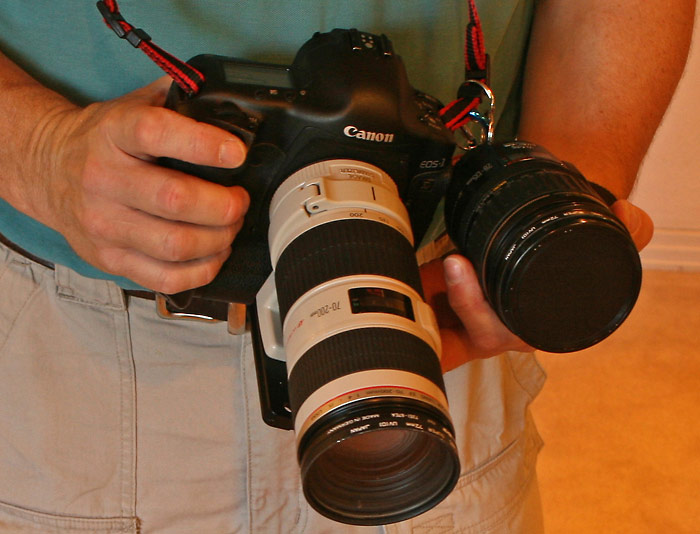
Figure 14. If action is happening, you can immediately
grab the camera and start shooting. If you have time, you can put
the old lens away.
http://clarkvision.com/articles/dslr.changing.lenses
First Published September 2, 2007
Last updated September 2, 2007.